


Repair #2:
The handle

We use the handle as a lever, which is a type of mechanism that can make things easier to turn. Let's find out more about how they work!
📹 How do levers work?
🧑🔬 Experiment: Building a lever
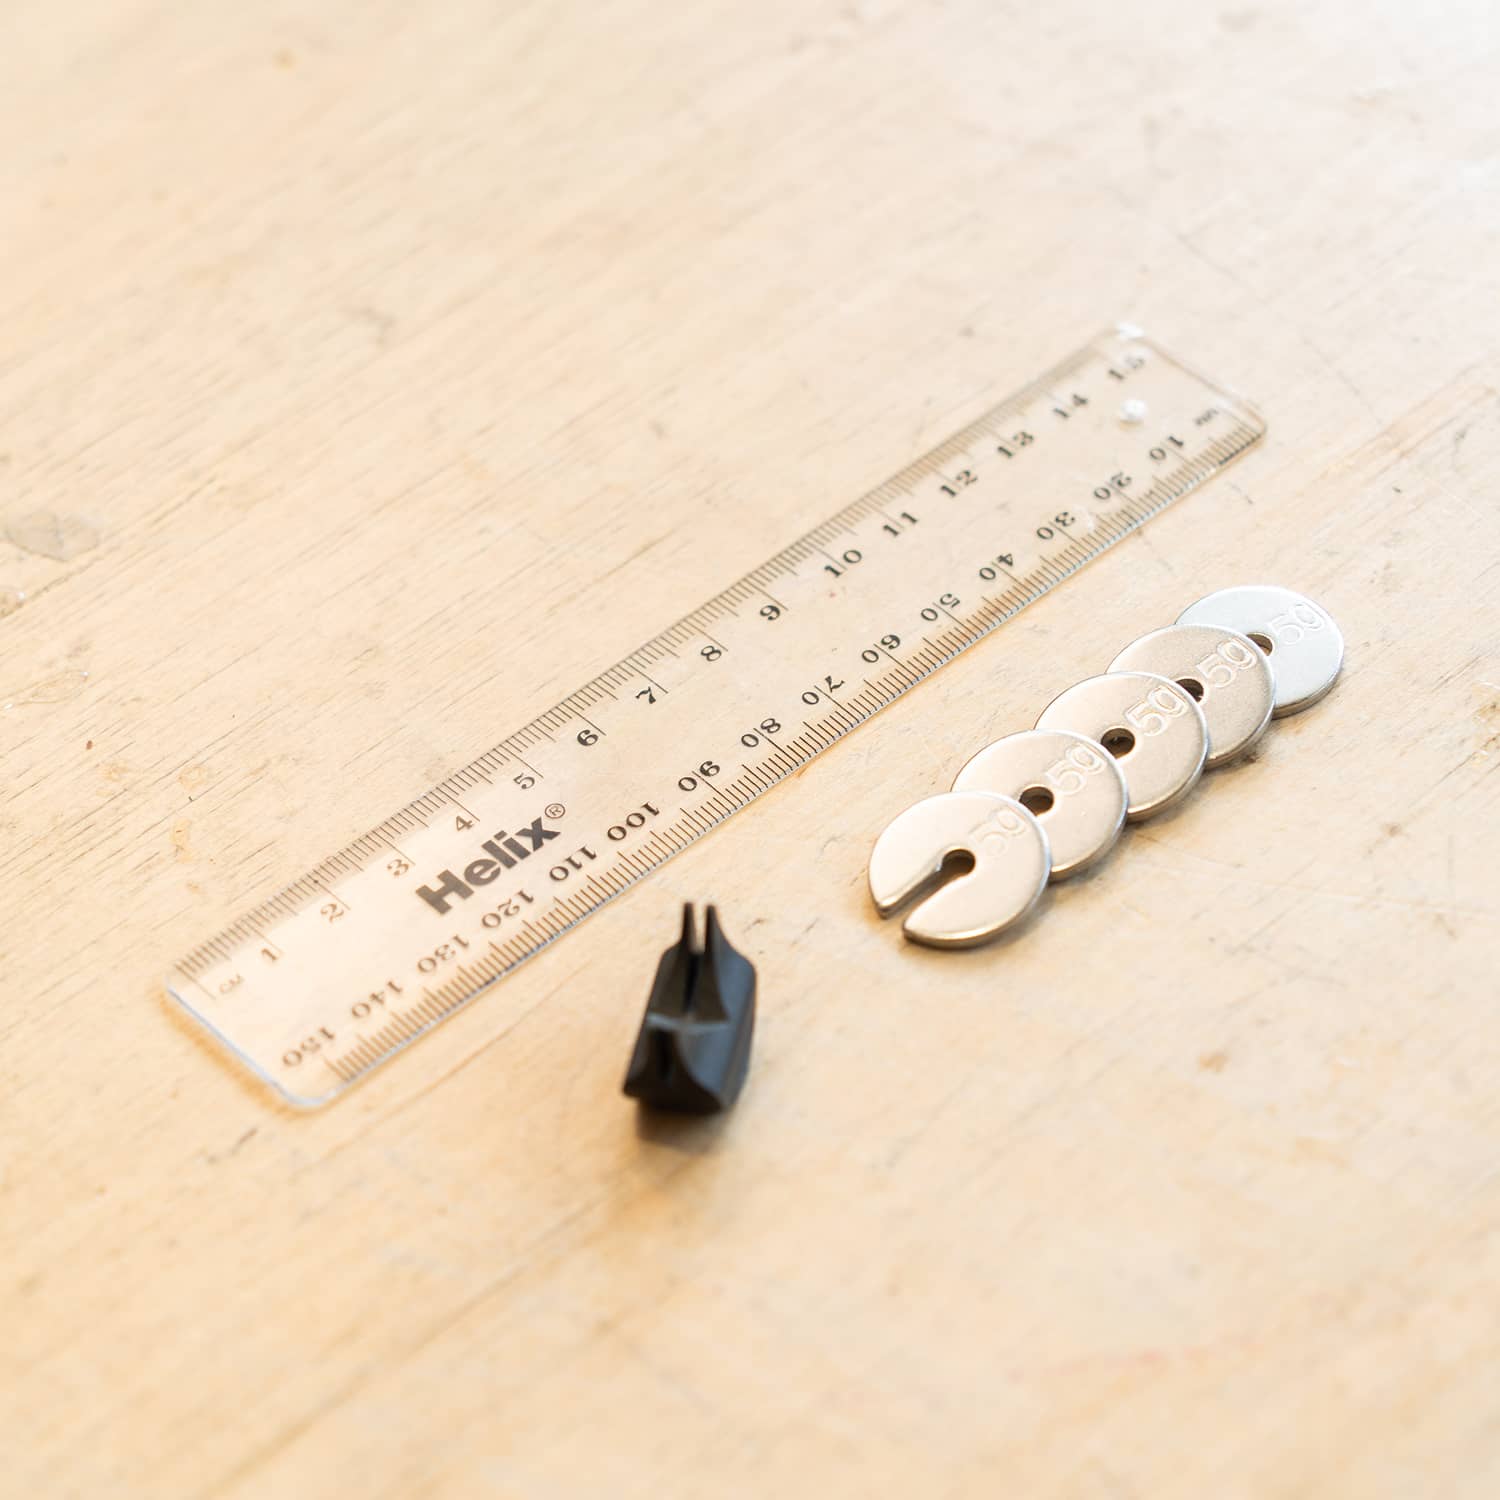
Check you have got all the parts shown in the photo.
Objective 1: Understand the effect that the handle has on turning the generator.
Objective 2: Calculate how much more force you can apply using the handle.
Step 1/10


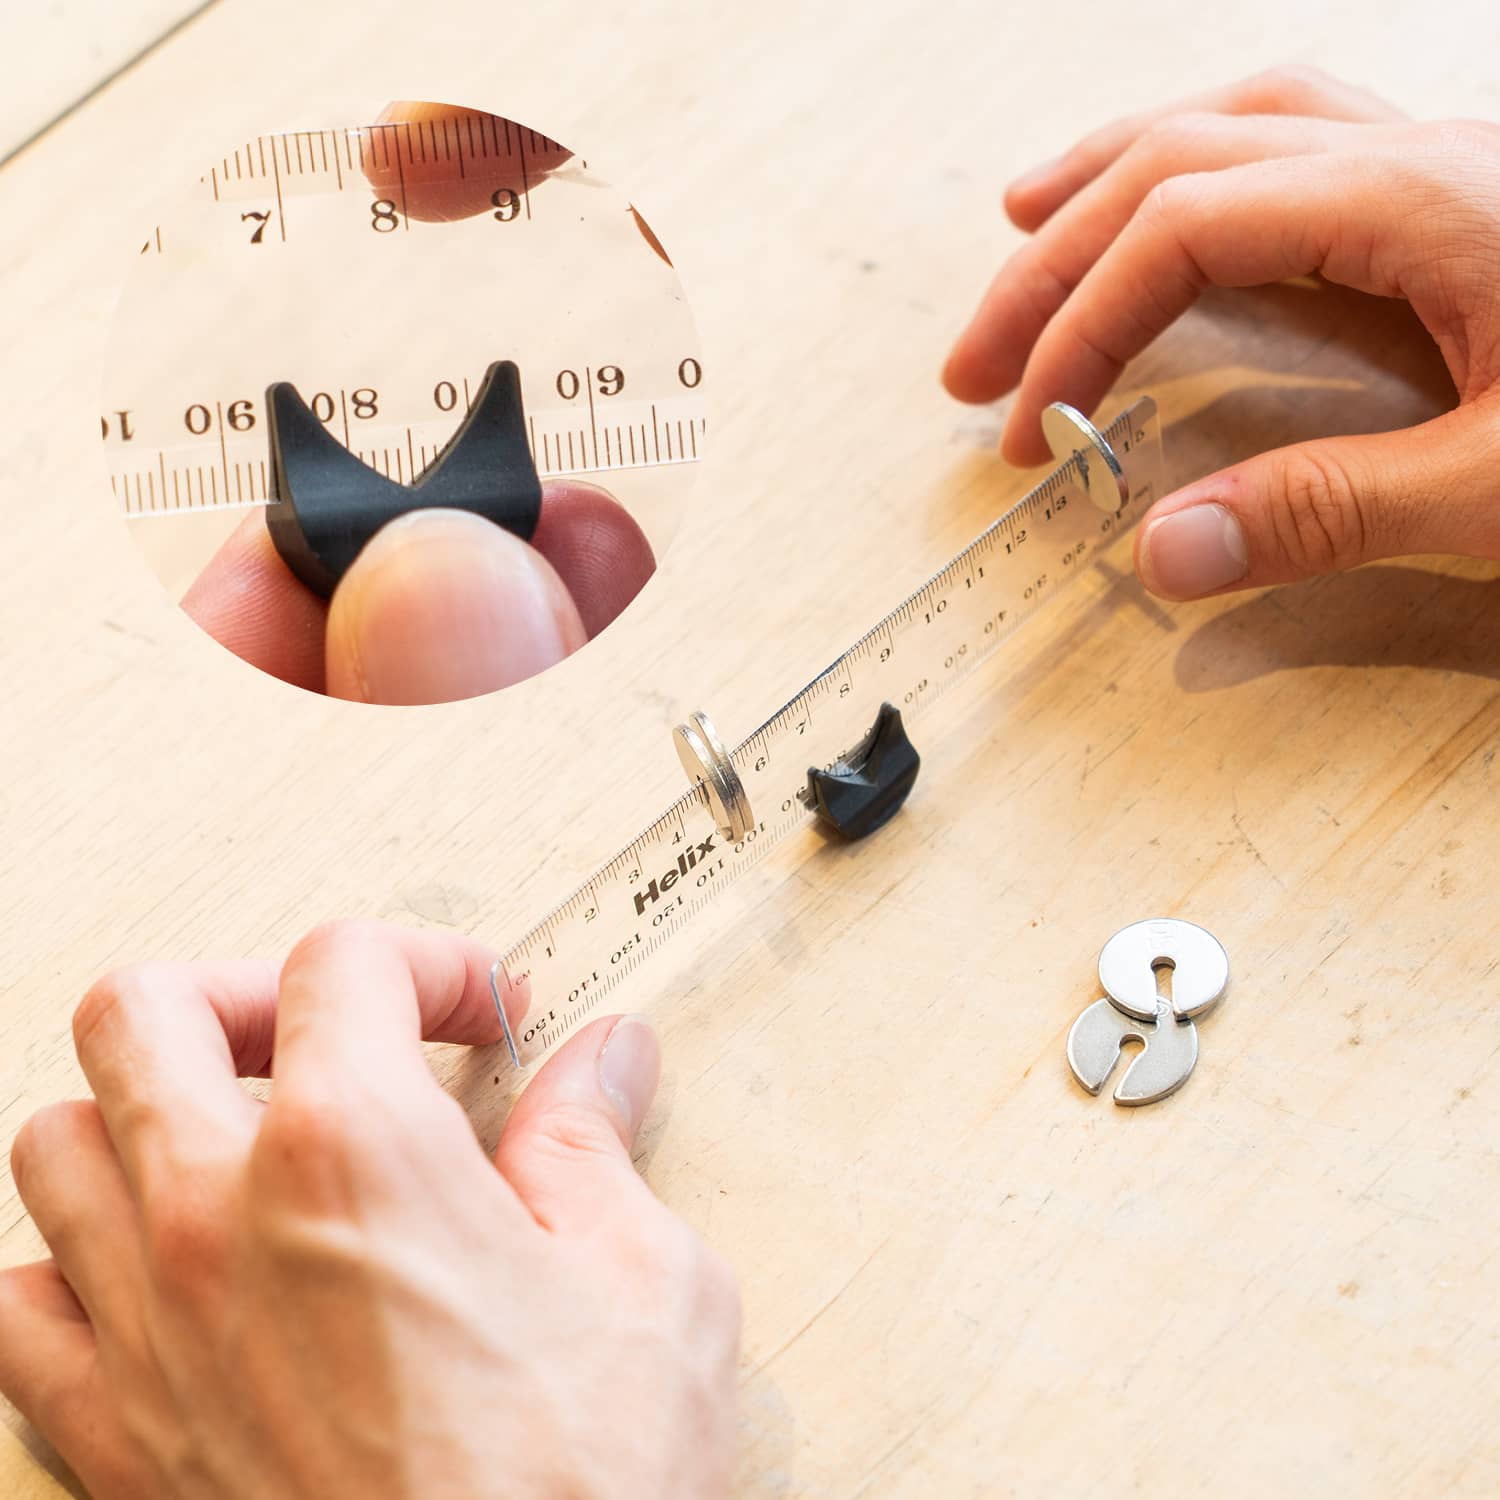
Balance the ruler on the pivot block
Once the ruler is balanced, try adding the weights and balancing the ruler for different weight combinations.
Step 2/10

🥅 Goal 1: Try to balance the lever using two weights, when the pivot point is in the middle
There are multiple ways you could do this!
Step 3/10

🥅 Goal 2: Try to balance the lever using one weight, when the pivot point is in the middle
There is only one configuration that will work...
Step 4/10

🥅 Goal 3: Try to balance the lever using three weights, when the pivot point is in the middle
How much further away from the pivot is the single weight than the pair of weights?
Step 5/10

🥅 Goal 4: Try to balance the lever when the pivot point is NOT in the middle
Think about how the weight of the beam will affect the torques...
Step 6/10
Now that you have tried to complete all the different challenges with the lever, it’s time to learn more about the principles that help the lever balance and check your solutions!
📹 Lever experiment solution
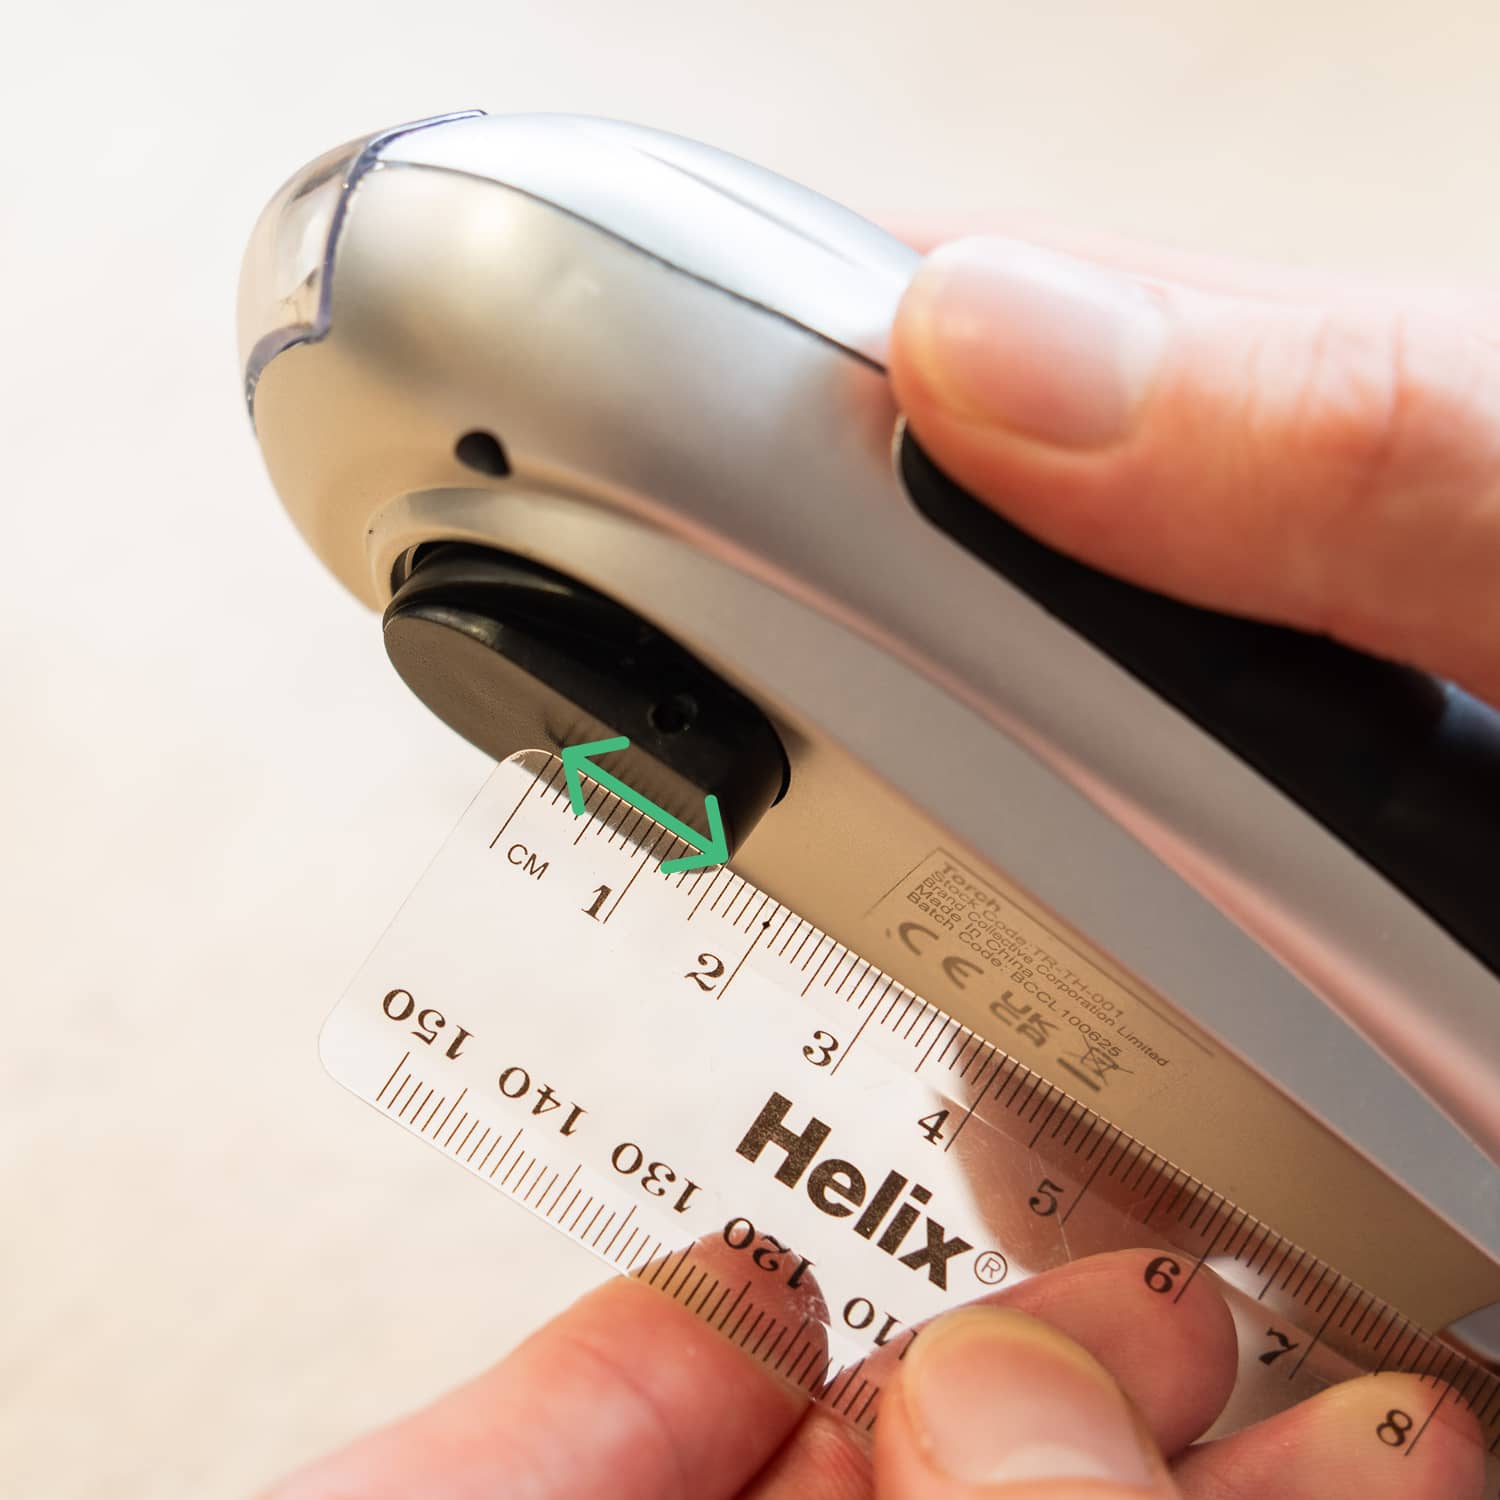
📝 Measure the distance from the pivot to the edge of the handle base
Let’s put what we just learnt about levers and pivots into practice!
Step 7/10
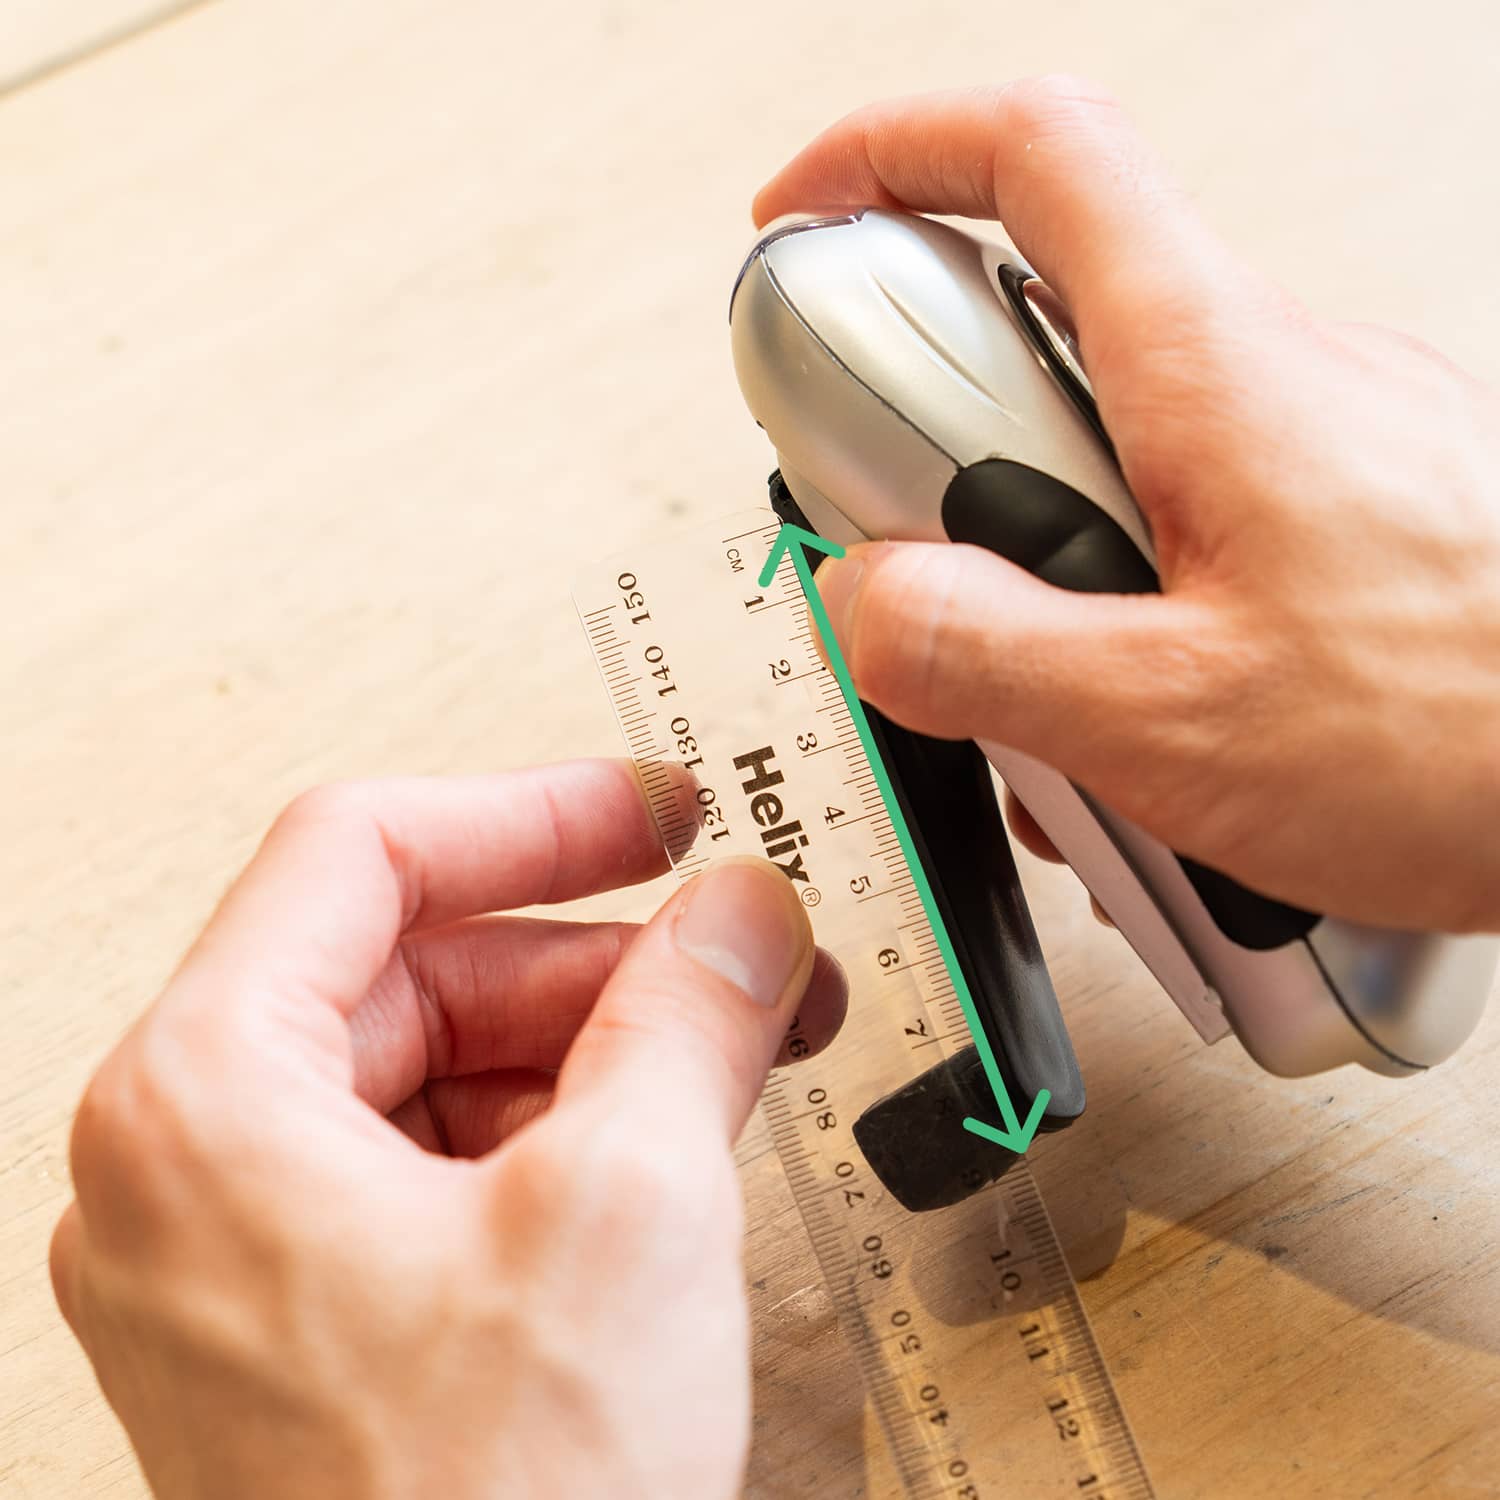
📝 Measure the distance from the pivot to the edge of the handle attachment
Remember - the longer the distance, the less force you need to apply the same torque.
Step 8/10
⚙️ Ratio Calculator
How much less effort would you need to turn the generator when the handle is attached?
The calculated ratio represents how much less force is required to produce the same torque, when turning the generator with and without the handle.
This is because Torque = Force x Distance, meaning as the length of the handle increases, it gets exactly that much easier to spin the handle.
Now that we know how important the handle is, let's get back to the repair.
📹 Applying force using a lever
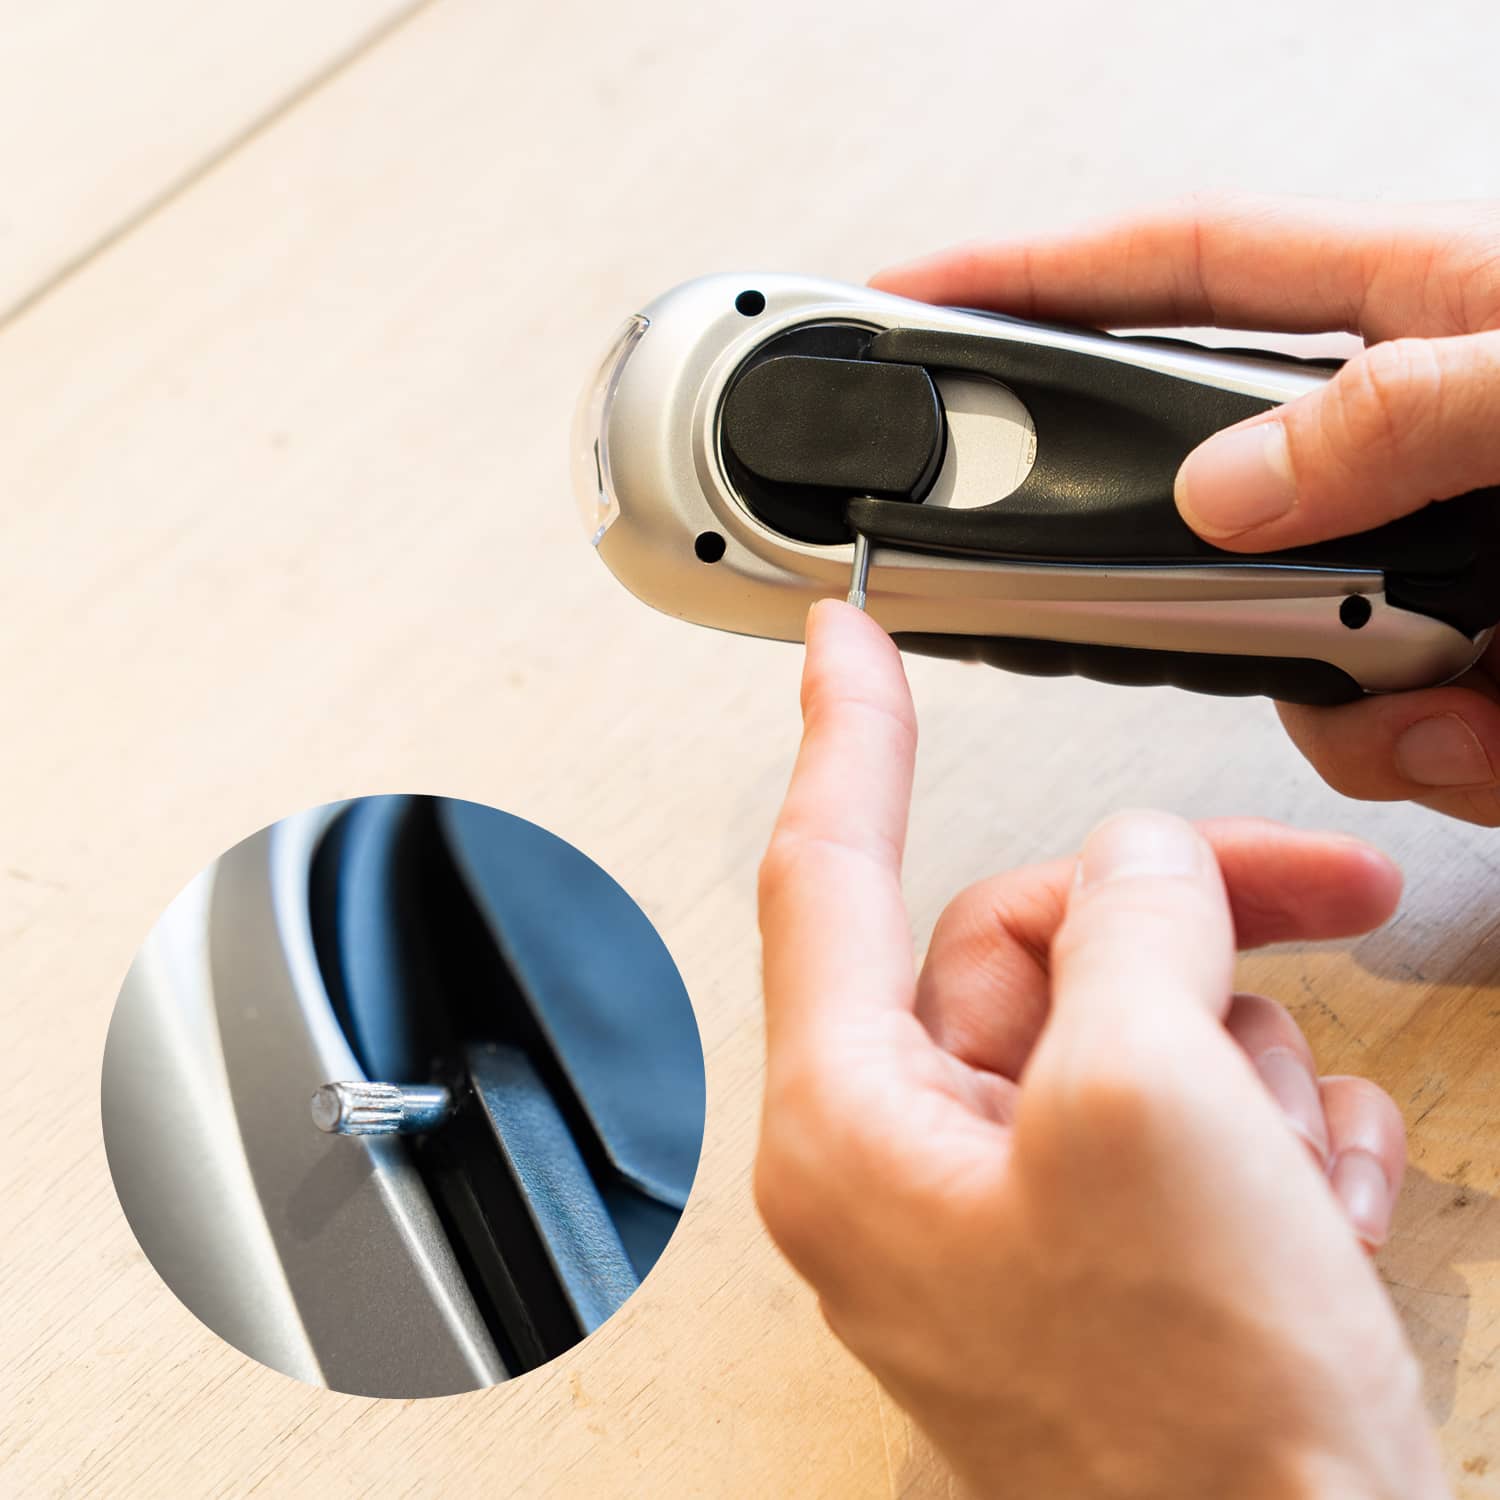
Reattach the handle
Use the handle pin from the components plastic case to reattach the handle.
Line up the handle as shown in the picture and slot the pin through both the handle and base. Push the pin in from the ridged end as shown in the photo above.
Step 9/10
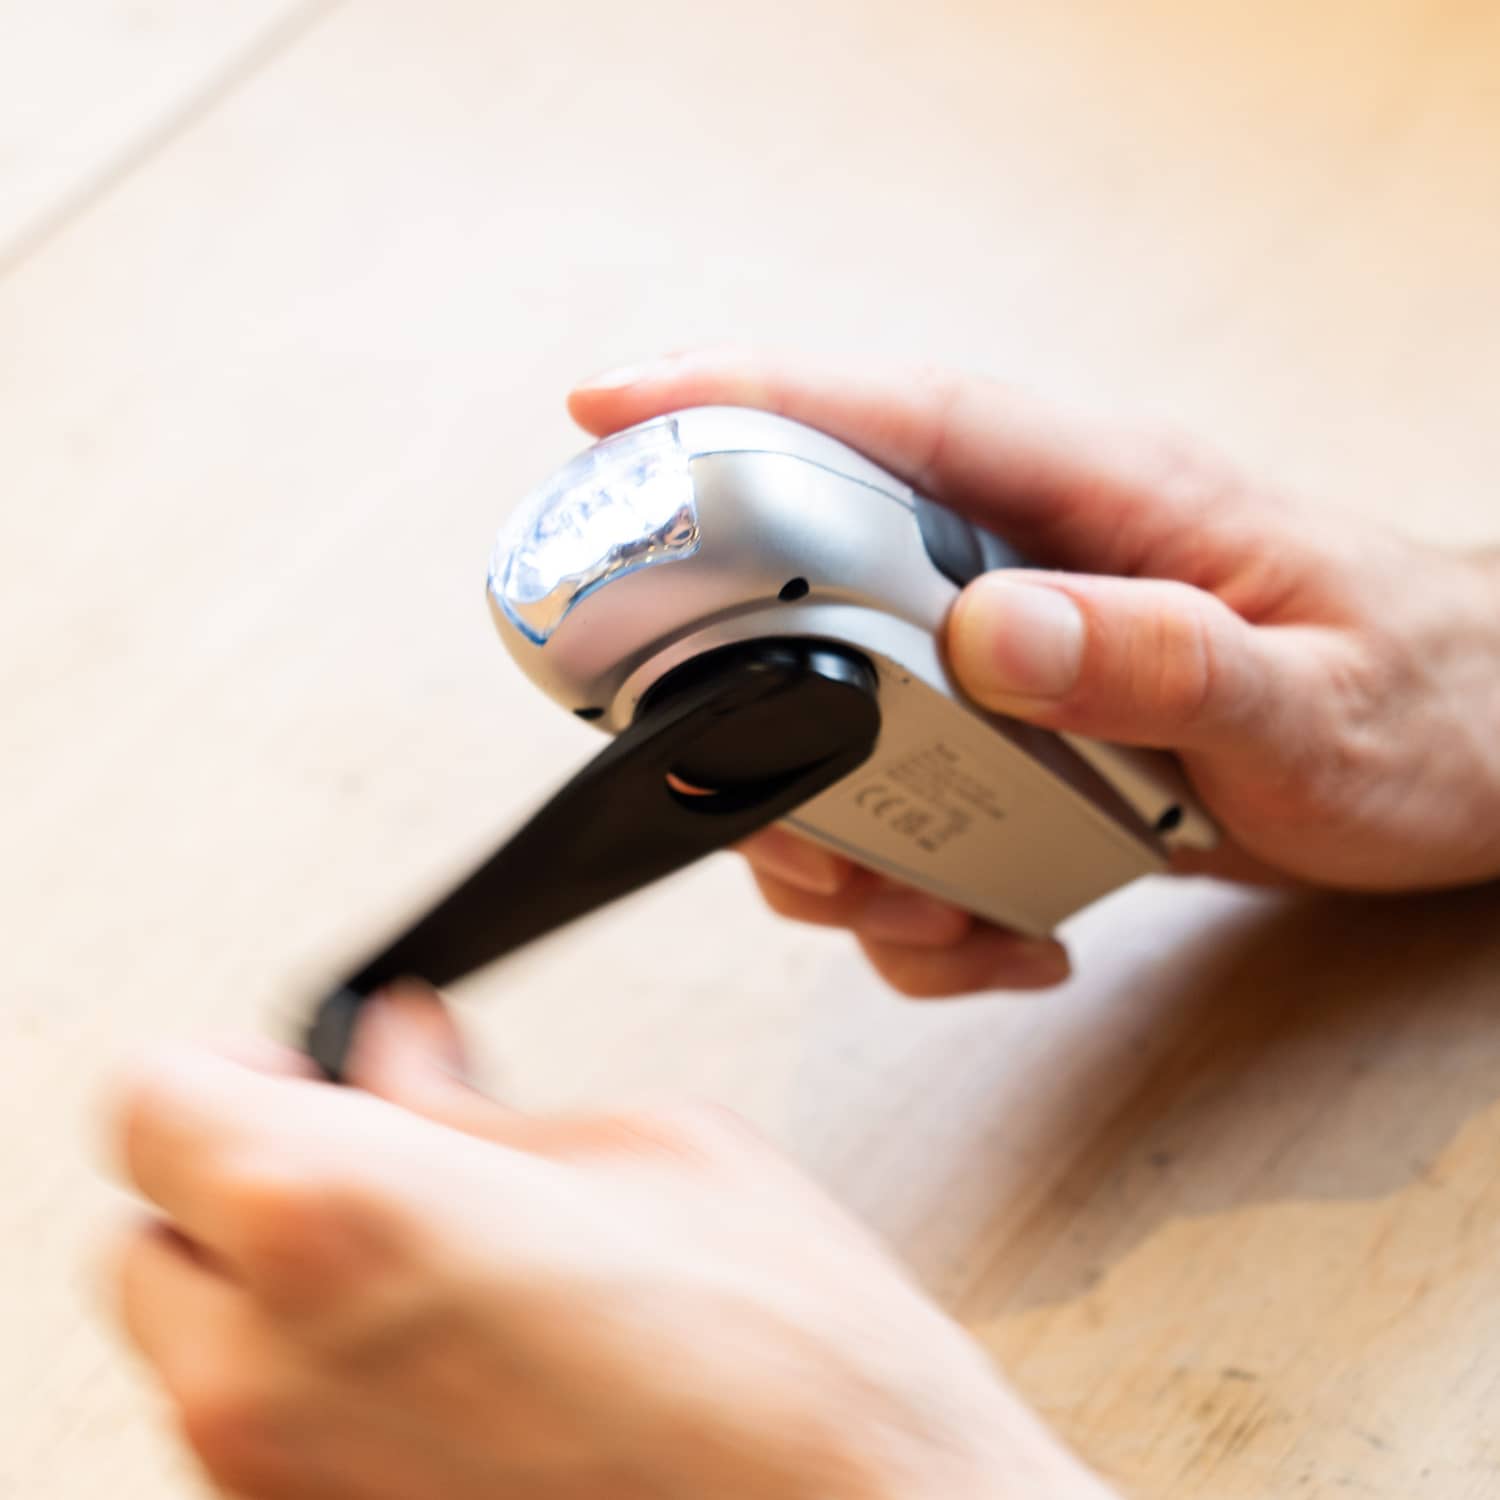
🎯 Test: Power the torch using the handle
Let's see how much easier it is to keep the lights on when using the handle.
Step 10/10
🏆 You fixed Fault #2! 🎉
You have fixed the handle! Now let’s carry on with testing the torch.